


Hunting and Fishing News Blog Articles
Wild Game Cured Salami
Wild game cured salami is a delicacy that combines the rich flavors of wild meats with the timeless tradition of curing and aging. Whether you've harvested deer, elk, or another wild game, crafting your own salami allows you to control the quality and flavor profile, resulting in a product that is uniquely yours.
Understanding the IngredientsSelecting the right meat is crucial for creating delicious wild game cured salami. The choice of meat not only impacts the flavor but also affects the texture and overall quality of the final product. Here's a closer look at some factors to consider when selecting meat for your salami:
1. Game Choice:Wild game meats offer a unique and rich flavor profile that sets them apart from traditional meats like beef or pork. Common choices for wild game salami include venison, elk, wild boar, and duck. Each type of game meat brings its own distinct characteristics to the table, so consider your personal preferences and the availability of different game meats in your area.
2. Lean vs. Fatty:When choosing meat for salami, it's important to strike the right balance between lean and fatty cuts. While some fat is necessary to add moisture and flavor to the salami, too much fat can result in a greasy or oily texture. Lean cuts of game meat, such as venison loin or elk sirloin, provide a solid foundation for salami without overwhelming the palate with excessive fat. However, a small amount of well-distributed fat can contribute to a smoother mouthfeel and enhance the overall taste experience.
3. Freshness:Freshness is key when it comes to selecting meat for salami. Look for cuts of meat that are bright in color, firm to the touch, and free from any off-putting odors. Avoid meats that appear discolored or have a slimy texture, as these may indicate spoilage. If possible, source your meat from a reputable butcher or game processor who can ensure its quality and freshness.
4. Aromatic Notes:Consider the aromatic notes of different game meats when making your selection. Venison, for example, has a slightly sweet and earthy flavor with hints of grassiness, while wild boar offers a more robust and gamey taste. Duck, on the other hand, has a rich and succulent flavor with undertones of sweetness and gaminess. Experimenting with different game meats allows you to explore a wide range of flavor profiles and create salami that appeals to your taste preferences.
5. Seasonal Availability:Keep in mind the seasonal availability of different game meats when planning your salami-making endeavors. Certain game animals, such as deer and elk, are typically hunted during specific seasons, which may impact their availability in the market. Plan ahead and consider factors like hunting seasons, local regulations, and sustainable harvesting practices when sourcing game meat for your salami.
By carefully considering factors such as game choice, fat content, freshness, aromatic notes, and seasonal availability, you can select the perfect meat for crafting your own delicious wild game cured salami. Experiment with different combinations and let your taste buds be your guide in creating a salami that is truly one-of-a-kind.
Spices and SeasoningsSpices and seasonings play a crucial role in elevating the flavor profile of wild game cured salami, adding depth, complexity, and a hint of aromatic richness. Here's a closer look at some of the essential spices and seasonings commonly used in salami-making:
1. Garlic:Garlic is a staple ingredient in many salami recipes, prized for its pungent flavor and aromatic qualities. Whether used in fresh or powdered form, garlic adds a bold and savory dimension to the salami, enhancing its overall taste profile. Experiment with different amounts of garlic to achieve your desired level of intensity, keeping in mind that a little goes a long way.
2. Black Pepper:Black pepper is another indispensable spice in salami-making, prized for its warm, spicy flavor and subtle heat. Whole peppercorns are often used to add texture and visual interest to the salami, while freshly ground pepper infuses the meat with its bold flavor. Adjust the amount of black pepper to suit your taste preferences, balancing its spiciness with other complementary ingredients.
3. Fennel Seeds:Fennel seeds impart a distinctive licorice-like flavor to the salami, adding depth and complexity to its taste profile. Toasting the fennel seeds before adding them to the meat mixture enhances their aroma and releases their essential oils, resulting in a more intense flavor. Experiment with different amounts of fennel seeds to find the perfect balance of sweetness and spice.
4. Paprika:Paprika adds a vibrant red hue and subtle smokiness to the salami, enhancing its visual appeal and flavor complexity. Choose between sweet, smoked, or hot paprika, depending on your desired level of heat and intensity. Sprinkle paprika liberally over the meat mixture or mix it directly into the spice blend for even distribution.
5. Salt:Salt is a critical component in salami-making, not only for seasoning but also for its preservative properties. Use a high-quality salt, such as kosher or sea salt, to enhance the natural flavors of the meat without overpowering them. Follow recommended guidelines for the proper ratio of salt to meat, ensuring a balanced and well-seasoned salami.
6. Additional Herbs and Spices:Feel free to get creative with your spice blend by incorporating additional herbs and spices to suit your taste preferences. Thyme, rosemary, oregano, and juniper berries are all popular choices for adding complexity and depth to the salami's flavor profile. Experiment with different combinations until you find the perfect balance of aromatics and seasonings.
By carefully selecting and combining spices and seasonings, you can enhance the flavor profile of your wild game cured salami, creating a truly unique and unforgettable culinary experience. Don't be afraid to experiment with different ingredients and adjust the seasoning to suit your taste preferences, as salami-making is as much an art as it is a science.
Curing AgentsCuring agents are essential ingredients in the art of making wild game cured salami, serving both to enhance flavor and to ensure the safety and longevity of the final product. Here's a closer look at some common curing agents used in salami-making:
1. Pink Salt (Sodium Nitrite):Pink salt, also known as Prague powder or curing salt, is a mixture of salt and sodium nitrite that serves as a potent curing agent in salami-making. It not only helps to preserve the meat by inhibiting the growth of harmful bacteria but also imparts a characteristic pink color and distinct flavor to the salami. Use pink salt sparingly, following recommended guidelines for the proper ratio of curing agent to meat to ensure safety.
2. Sodium Nitrate:Sodium nitrate is another curing agent commonly used in salami-making, although it is less commonly found in modern recipes due to safety concerns. Sodium nitrate slowly breaks down into sodium nitrite over time, providing a longer-lasting cure and more consistent results. However, excessive consumption of sodium nitrate has been linked to health risks, so it's important to use it judiciously and in accordance with recommended guidelines.
3. Celery Powder:Celery powder is a natural alternative to synthetic curing agents like sodium nitrite, prized for its ability to impart a similar curing effect while avoiding the potential health risks associated with synthetic additives. Celery powder contains naturally occurring nitrates, which convert to nitrite during the curing process, effectively preserving the meat and giving the salami its characteristic color and flavor. When using celery powder as a curing agent, be sure to follow recommended guidelines for proper usage to ensure food safety.
4. Salt:In addition to its role as a seasoning agent, salt also serves as a natural curing agent in salami-making, drawing out moisture from the meat and creating an inhospitable environment for bacteria to thrive. Use a high-quality salt, such as kosher or sea salt, to ensure even curing and proper flavor development. Remember to adjust the amount of salt based on the specific curing agent you're using and the overall saltiness of your recipe.
5. Sugar:While not technically a curing agent, sugar is often added to salami recipes to balance out the saltiness and enhance flavor complexity. Sugar also helps to feed the beneficial bacteria responsible for fermentation, resulting in a more consistent and controlled curing process. Experiment with different types of sugar, such as white sugar, brown sugar, or honey, to achieve your desired level of sweetness and flavor depth.
By understanding the role of curing agents in salami-making and selecting the appropriate ingredients for your recipe, you can ensure the safety, flavor, and quality of your wild game cured salami. Whether you opt for traditional curing salts or natural alternatives like celery powder, always follow recommended guidelines and best practices to achieve delicious and satisfying results.
Preparing the MeatTrimming and grinding the meat are crucial steps in the process of preparing wild game for cured salami. Properly trimming the meat removes excess fat and sinew, while grinding it to the correct consistency ensures an even distribution of flavor and texture in the finished product. Here's a closer look at each step:
1. Trimming:Before you begin grinding the meat, it's essential to trim away any visible fat, connective tissue, and silver skin from the surface. While some fat is desirable for flavor and moisture, too much can lead to a greasy or oily texture in the finished salami. Use a sharp knife to carefully trim the meat, taking care to remove any tough or undesirable portions. Aim for lean cuts with minimal marbling for the best results.
2. Grinding:Once the meat is properly trimmed, it's time to grind it to the desired consistency. Use a meat grinder fitted with the appropriate-sized grinding plate to achieve the texture you prefer. A coarse grind is typically preferred for salami, as it provides a rustic texture and allows the spices and seasonings to permeate the meat more evenly.
When grinding the meat, work in small batches to prevent the grinder from becoming overloaded and to ensure a consistent texture throughout. Keep the meat cold during the grinding process by placing it in the freezer for a short period before grinding. This helps to maintain the integrity of the fat and ensures a smoother grinding process.
3. Mixing Ingredients:After the meat is ground to the desired consistency, it's time to mix in the spices, seasonings, and curing agents. In a large mixing bowl, combine the ground meat with your chosen ingredients, taking care to evenly distribute the seasonings throughout. Mix the ingredients by hand or using a stand mixer until they are well incorporated and the mixture holds together.
Be sure to mix the ingredients thoroughly, but avoid overmixing, as this can result in a dense and tough texture in the finished salami. Take care not to compact the meat too tightly during mixing, as this can inhibit the curing process and prevent proper flavor development.
By carefully trimming and grinding the meat and mixing in the appropriate seasonings and spices, you can ensure that your wild game cured salami is flavorful, moist, and perfectly textured. Take your time with each step, and don't be afraid to experiment with different combinations of ingredients to create a salami that suits your taste preferences.
Mixing IngredientsIn a large bowl, combine the ground meat with your chosen spices and seasonings. Mix thoroughly by hand or using a stand mixer until the ingredients are evenly distributed.
Stuffing and CasingSelecting the right casings is an important aspect of making wild game cured salami, as they not only shape the salami but also contribute to its flavor, texture, and overall presentation. Here's what you need to know about choosing casings for your salami:
1. Natural Casings:Natural casings, typically made from the intestines of animals like pigs, sheep, or cattle, are the traditional choice for making salami. They offer a natural, traditional look and feel, and they allow the salami to develop a distinctive "bloom" during the aging process. Natural casings also provide a satisfying snap when bitten into, adding to the overall eating experience.
2. Synthetic Casings:Synthetic casings, made from materials like collagen or cellulose, are a convenient and cost-effective alternative to natural casings. They come in a variety of sizes and shapes, allowing for greater flexibility in salami production. Synthetic casings are uniform in size and shape, making them easier to work with and ideal for large-scale production. However, they lack the traditional look and texture of natural casings.
3. Size and Shape:When choosing casings for your salami, consider the size and shape of the finished product. Casings come in various diameters, ranging from small snack-sized salamis to large-format varieties. Select a casing size that matches the intended use of your salami, whether it's for slicing thinly for charcuterie boards or serving as a standalone snack.
4. Soaking and Preparation:Before using natural casings, it's essential to soak them in water to soften and hydrate them. This makes them more pliable and easier to work with during the stuffing process. Synthetic casings typically do not require soaking and can be used straight out of the packaging. However, be sure to follow the manufacturer's instructions for any specific preparation steps.
5. Quality and Freshness:Whether you opt for natural or synthetic casings, it's crucial to ensure they are of high quality and freshness. Check for any signs of damage, such as tears or holes, which can compromise the integrity of the casing and lead to uneven drying or spoilage. Store casings in a cool, dry place away from direct sunlight until ready to use to maintain their freshness.
6. Flavor Considerations:Natural casings can impart a subtle flavor to the salami, adding to its overall character and complexity. Synthetic casings, on the other hand, are neutral in flavor and allow the seasonings and spices to shine through. Consider your personal preferences and the flavor profile you wish to achieve when selecting casings for your salami.
By carefully considering factors such as casing type, size, preparation, quality, and flavor, you can choose the perfect casings for your wild game cured salami. Whether you prefer the traditional look and texture of natural casings or the convenience of synthetic alternatives, selecting the right casings is key to creating a salami that is both visually appealing and delicious.
Stuffing the SalamiStuffing the salami is a critical step in the salami-making process, as it determines the shape, texture, and overall appearance of the finished product. Properly stuffing the salami ensures that it cooks evenly, retains its shape during drying and aging, and develops a desirable texture. Here's what you need to know about stuffing wild game cured salami:
1. Choosing the Right Equipment:Before you begin stuffing the salami, gather all the necessary equipment, including a sausage stuffer or piping bag and appropriately sized casings. Ensure that the sausage stuffer is clean and in good working condition, and that the casings have been soaked in water to soften them and make them more pliable.
2. Filling the Casing:Start by carefully threading the prepared casing onto the nozzle of the sausage stuffer, taking care not to tear or puncture it. Leave a small overhang at the end of the casing to tie off later. Once the casing is securely in place, begin feeding the meat mixture into the stuffer, using gentle pressure to pack it evenly and avoid air pockets.
3. Avoiding Air Pockets:As you fill the casing with the meat mixture, take care to eliminate any air pockets that may form. Air pockets can cause uneven drying and spoilage, so it's essential to pack the casing tightly and evenly. Use your fingers or a sausage pricker to gently massage the casing and release any trapped air bubbles.
4. Achieving Consistent Thickness:When stuffing the salami, aim for a consistent thickness throughout to ensure even cooking and drying. Avoid overfilling the casing, as this can lead to bursting during the drying process. Instead, fill the casing to the desired level, leaving a small amount of space at the end to allow for tying off and securing.
5. Tying Off:Once the casing is filled to your satisfaction, carefully twist or tie off the open end to secure the meat mixture inside. Use kitchen twine or butcher's string to tie off the salami at regular intervals, creating individual links or segments. This not only helps to maintain the shape of the salami but also allows for easy slicing and serving later on.
6. Pricking:After tying off the salami, use a sausage pricker or sterilized needle to pierce any remaining air pockets and create small holes in the casing. This allows excess moisture to escape during the drying process and helps to prevent spoilage. Be careful not to puncture the casing too deeply, as this can cause the salami to lose its shape or dry out too quickly.
By following these tips and techniques for stuffing wild game cured salami, you can ensure that your salami turns out perfectly shaped, evenly textured, and deliciously flavorful. Take your time with each step, and don't be afraid to experiment with different casings, seasonings, and stuffing techniques to create a salami that suits your taste preferences and culinary style.
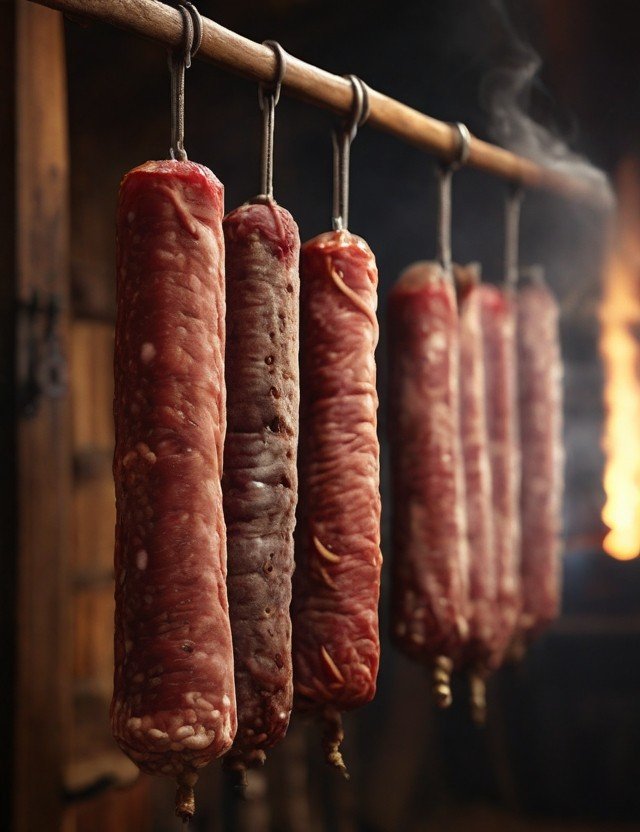
Curing ProcessHanging and drying are critical steps in the process of making wild game cured salami, as they allow the flavors to concentrate, the texture to firm up, and the salami to develop its characteristic aroma and taste. Proper hanging and drying techniques are essential for achieving a safe and delicious final product. Here's what you need to know:
1. Creating the Ideal Environment:Before hanging the salami, it's essential to prepare a suitable drying environment. Choose a cool, well-ventilated space with low humidity, such as a cellar, basement, or dedicated curing chamber. The ideal temperature for drying salami is typically between 55°F and 65°F (13°C and 18°C), with humidity levels around 70% to 80%. Proper air circulation is crucial for even drying, so ensure there is adequate airflow around the salami.
2. Hanging the Salami:Once you've prepared the drying environment, it's time to hang the salami. Use butcher's hooks or kitchen twine to suspend the salami from a sturdy overhead support, such as a wooden dowel or metal rack. Ensure that the salami is evenly spaced and does not come into contact with any surfaces or other salamis. This allows air to circulate freely around the salami and promotes even drying.
3. Allowing Sufficient Drying Time:The drying time for salami can vary depending on factors such as the size of the salami, the humidity level, and personal preference. As a general rule of thumb, allow the salami to hang and dry for at least several days to a week before assessing its readiness. During this time, the salami will lose moisture, firm up, and develop a protective outer layer known as the pellicle.
4. Monitoring the Drying Process:Throughout the drying process, it's important to monitor the salami regularly to ensure that it is drying evenly and safely. Check for any signs of mold growth, such as fuzzy white or green patches, and promptly remove any affected salamis. Rotate the salamis periodically to promote even drying and prevent any areas from becoming too dry or moist.
5. Adjusting the Environment:If necessary, make adjustments to the drying environment to maintain optimal conditions. This may include using a dehumidifier to lower humidity levels or a fan to increase airflow. Be mindful of any fluctuations in temperature or humidity and adjust accordingly to ensure consistent drying.
6. Testing for Doneness:To test whether the salami is ready, gently squeeze it between your fingers. It should feel firm and springy to the touch, with no soft spots or sponginess. Additionally, the salami should have lost around 30% to 40% of its original weight during the drying process. Once the salami passes these tests, it is ready for the next stage of aging.
By following these tips and techniques for hanging and drying wild game cured salami, you can ensure that your salami develops the perfect texture, flavor, and aroma. Take your time with each step, and be patient as the salami undergoes its transformation into a delicious and fully cured delicacy.
AgingAging is the final stage in the process of making wild game cured salami, during which the flavors mature, the texture develops, and the salami reaches its peak of perfection. Proper aging is essential for achieving a complex and nuanced flavor profile, as well as ensuring the safety and stability of the salami. Here's what you need to know about aging wild game cured salami:
1. Choosing the Right Conditions:Selecting the appropriate conditions for aging is crucial for the success of the process. Aim for a cool, dark, and well-ventilated space with consistent temperature and humidity levels. Ideally, the aging environment should maintain a temperature of around 50°F to 60°F (10°C to 15°C) and humidity levels between 60% and 70%. Avoid fluctuations in temperature and humidity, as these can affect the quality and safety of the salami.
2. Patience is Key:Aging wild game cured salami requires patience and time, as the flavors need time to develop and mature. Depending on personal preference and the desired flavor profile, salami can be aged anywhere from several weeks to several months. During this time, the salami undergoes a process of slow fermentation and enzymatic breakdown, resulting in a complex and well-rounded flavor.
3. Monitoring the Aging Process:Regular monitoring is essential during the aging process to ensure that the salami is progressing as expected and to address any issues that may arise. Check the salami periodically for signs of mold growth, excessive moisture, or off odors. Mold growth is normal and can be carefully wiped away with a clean cloth dampened with vinegar, but any signs of spoilage should be addressed immediately.
4. Flavor Development:As the salami ages, its flavor will continue to evolve and intensify, with subtle nuances and complexities emerging over time. The aging process allows the flavors of the spices, seasonings, and curing agents to meld together, resulting in a harmonious and well-balanced taste profile. Taste the salami periodically as it ages to gauge its progress and adjust the aging time as needed to achieve the desired flavor.
5. Texture and Consistency:In addition to flavor development, aging also allows the texture of the salami to mature and firm up. The outer layer of the salami will become dry and firm, while the interior will retain a moist and tender texture. Proper aging ensures that the salami is uniformly dry and stable throughout, with a satisfying chewiness and richness of flavor.
6. Storing and Serving:Once the salami has reached its desired level of aging, it can be stored in a cool, dry place or refrigerated to maintain its freshness. When ready to serve, slice the salami thinly on a bias to maximize flavor and texture, and enjoy it on its own or as part of a charcuterie board with accompaniments like crusty bread, cheese, and pickled vegetables.
By following these guidelines for aging wild game cured salami, you can ensure that your salami develops a rich and complex flavor profile, with a satisfying texture and aroma that is sure to impress. Take your time with each step, and savor the rewards of your patience and dedication as you enjoy the fruits of your labor.
Crafting your own wild game cured salami is a rewarding culinary endeavor that allows you to showcase the flavors of the hunt in a timeless delicacy. With careful attention to ingredient selection, preparation techniques, and curing methods, you can create a salami that is sure to impress even the most discerning palates.
Visit DineWild.com for more wild game recipes.
